
How To Make Beautiful Potted Plants With Jewelry Beads
Are you looking for something crafty to do on a rainy day? I’ve got the perfect project for you! I’m totally obsessed. This impressive craft results in charming home decor that you will surely be proud to display anywhere in the house.
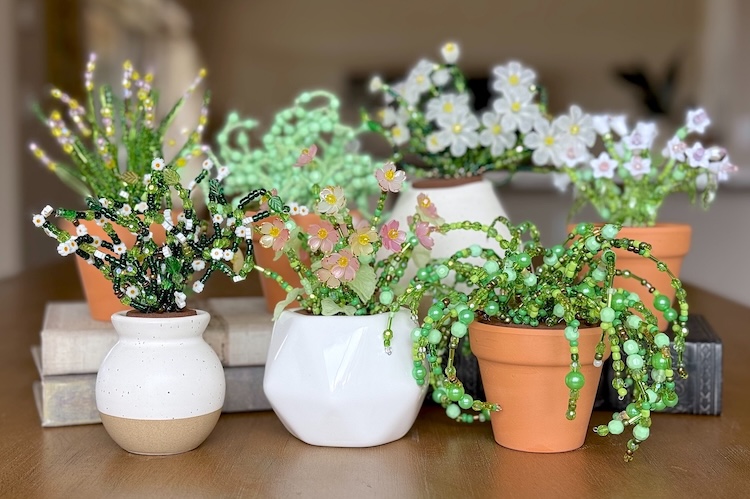
The beads catch the light beautifully, giving each plant a jewel-like appearance that looks just as lovely on a windowsill as it does on a desk, entry table, or book shelf. But the best part, there’s no watering required! These are the easiest house “plants” you’ll ever have to take care of.
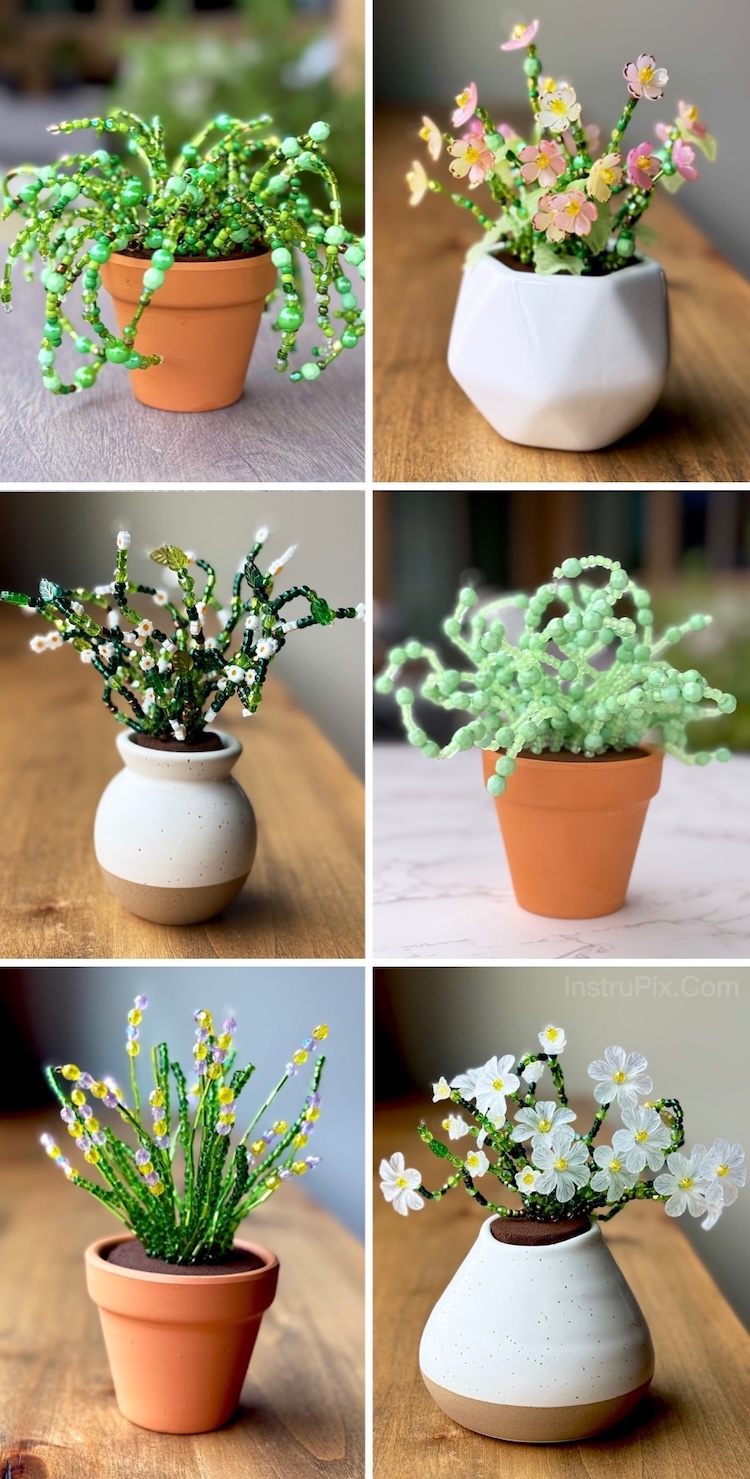
This unique craft is also the ultimate handmade gift idea because these faux plants are truly fun to make with a stunning result. I adored this project so much, I went a LITTLE CRAZY. I made several of these gorgeous beaded blooms in a variety of styles to mimic common house plants.
I’ve included all of the exciting details and step-by-step photos below so that you can ALSO make your own jewelry inspired house plant! I’ve never been so delighted to share such a cool project.
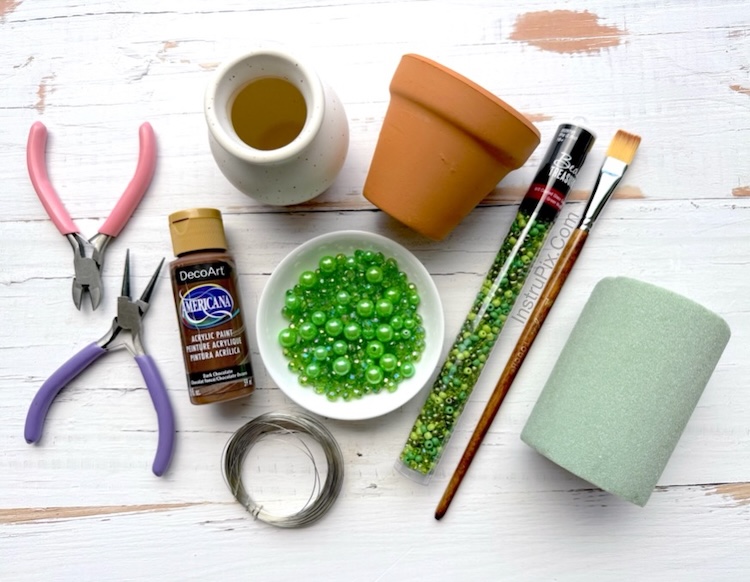
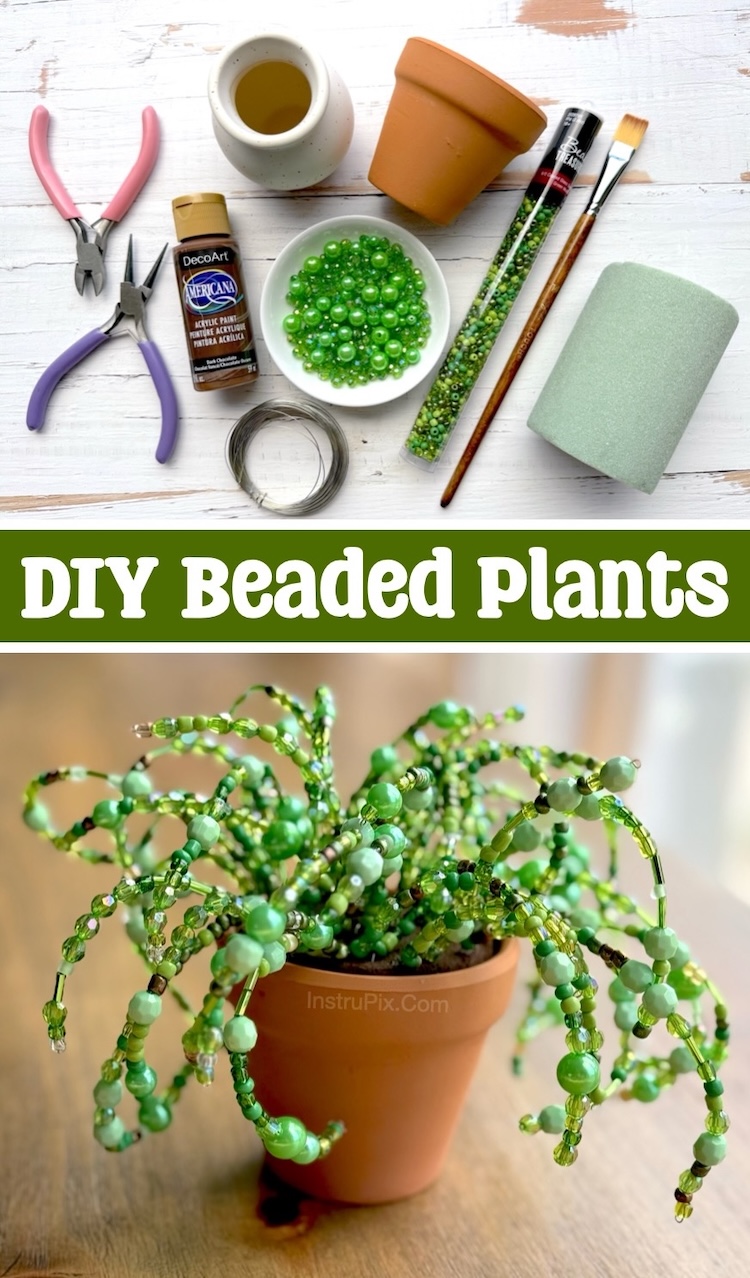
Supplies Needed
- small pot(s) of choice
- floral foam
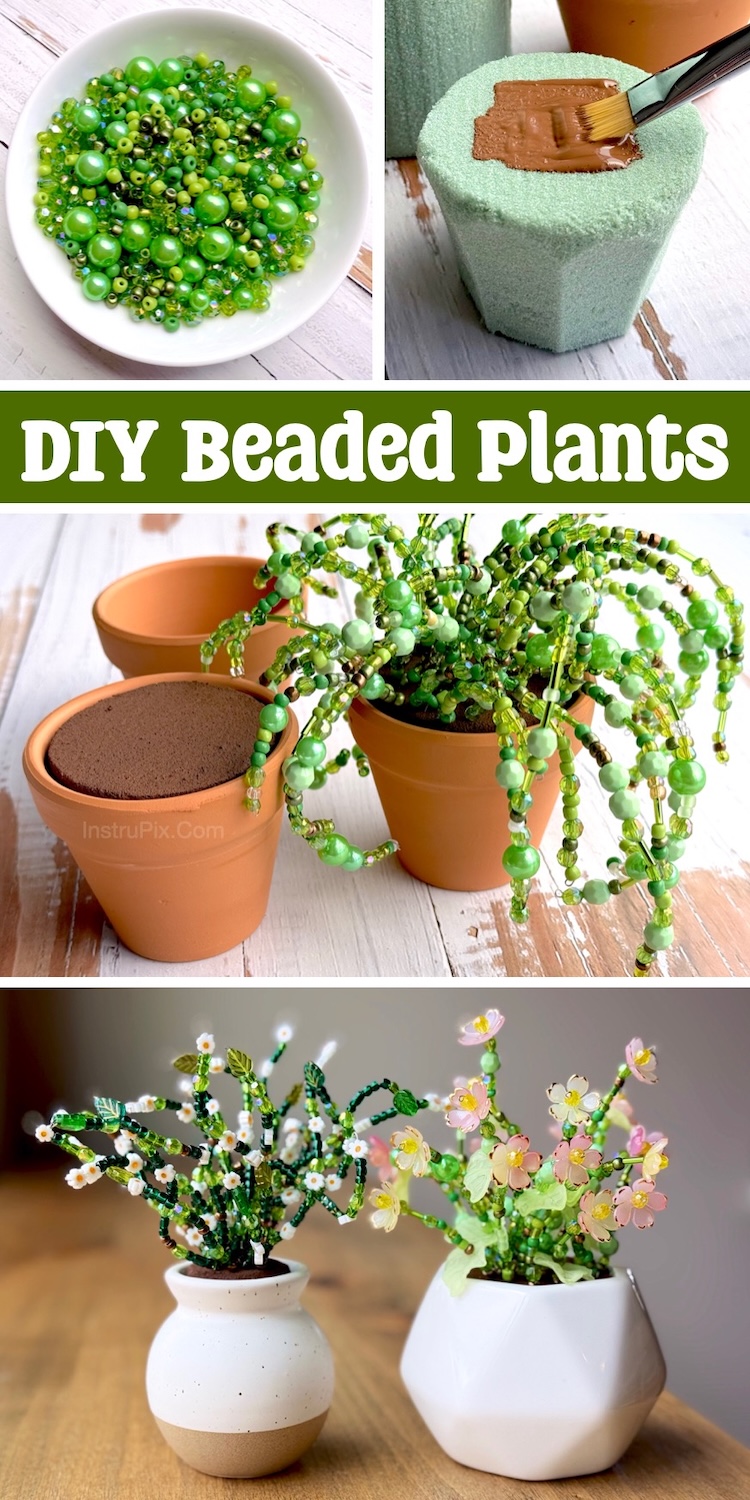
- variety of green beads
- 26 gauge jewelry wire
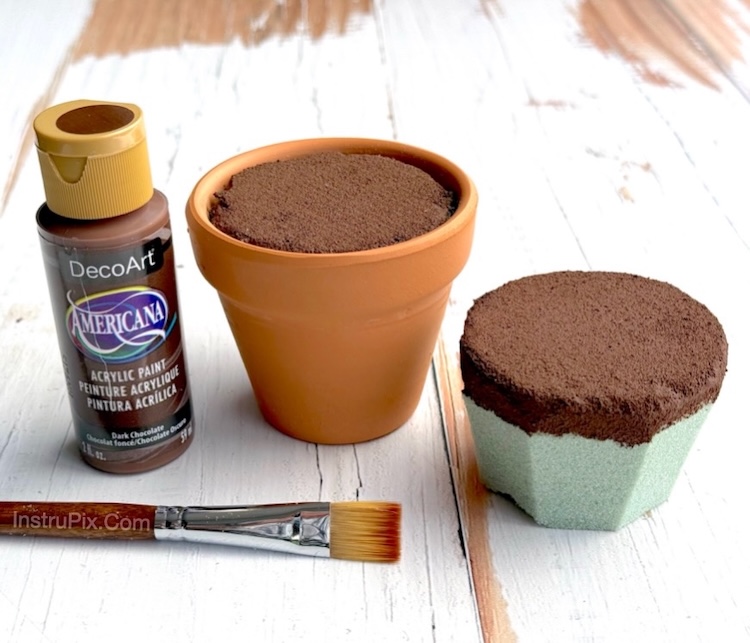
- brown acrylic paint
- small paint brush
- wire cutters
- round nose pliers
- Any dull knife to cut the foam (not pictured)
*** Before you go shopping, read the helpful tips and tricks below on how to choose your supplies.
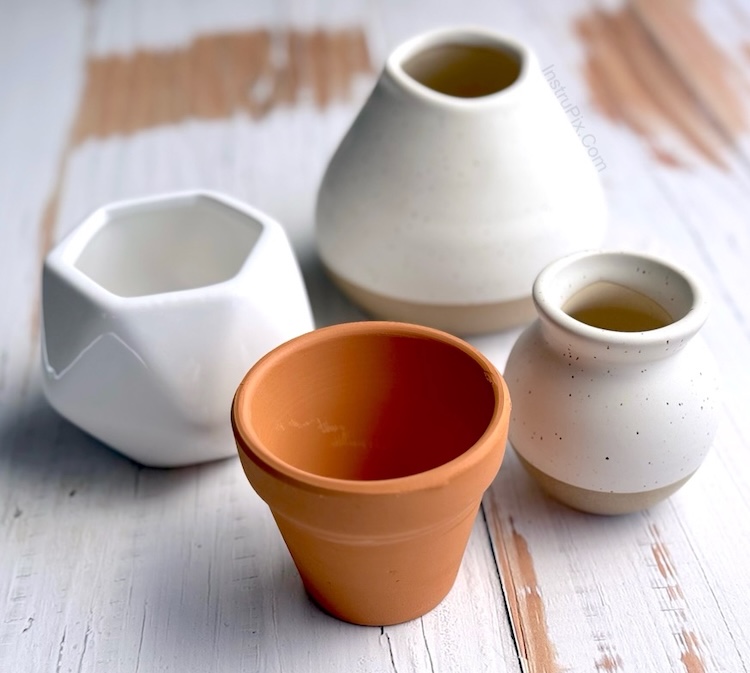
Choosing Your Pots
I recommend 3-inch clay pots or any decorative pots with a small opening. The clay pots are inexpensive and can be found at most crafts stores for less than $2 (just be sure to check for cracks and chips). If you’re not a fan of the natural orange color, you might consider picking up a small bottle of white or tan acrylic paint. I was also lucky enough to find a few other ceramic pots on sale at Hobby Lobby. I couldn’t resist nabbing them for this amazing project!
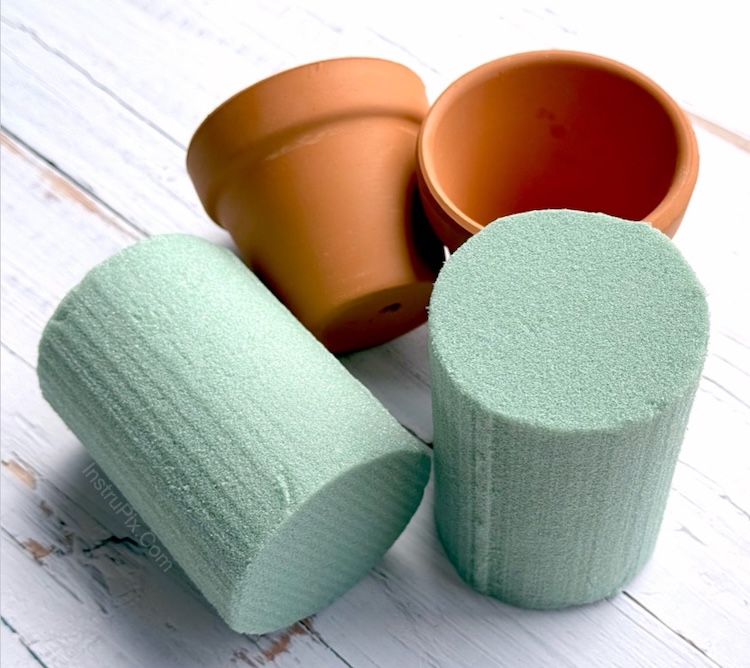
Choosing Your Foam
Although any foam could probably be used for this craft, I used floral foam out of convenience. I found a 2 pack of 2.4 inch x 3.75 inch foam that fit perfectly into my 3-inch pots with minimal cutting required. Keep the size of your foam in mind when purchasing your pots.
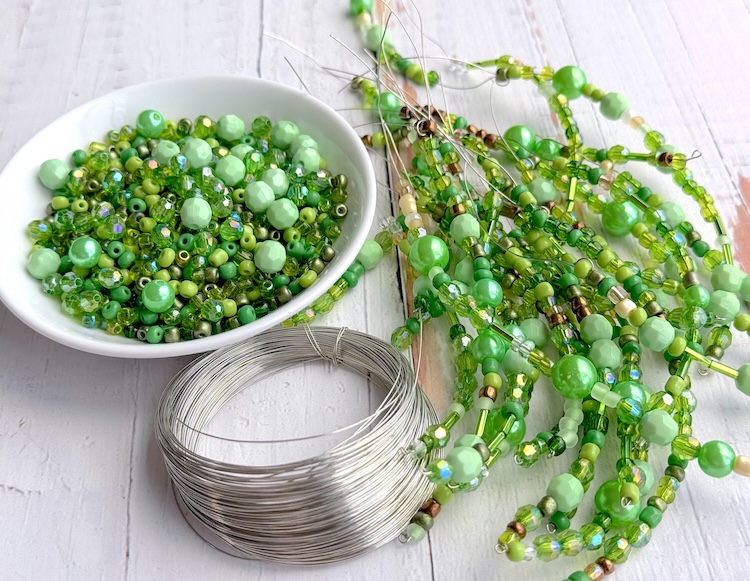
Choosing Your Beads & Wire
I opted for 26 gauge jewelry wire and it seemed to work perfectly with my choice of beads and plant styles. You could use a thicker wire (20 or 24 gauge) if you plan on using large or heavy beads that might flop over. I also recommend a variety of bead shades and sizes for added interest. Just be sure that they have the appropriate size thread holes. They should easily lace onto your wire without being too loose or too tight.
HINT: I was not able to find flower beads at the craft store so I purchased quite a few on Amazon. I’ve included specific links in the photos below if you’re interest in any particular bead that I used.
Step By Step Tutorial – Let’s Go!
Once you’ve got the supplies gathered, this project is easy, versatile, and can be enjoyed alone or as a group. I spent a few days making these with my daughter, and even my husband couldn’t help but gather around the table and string a few stems together.
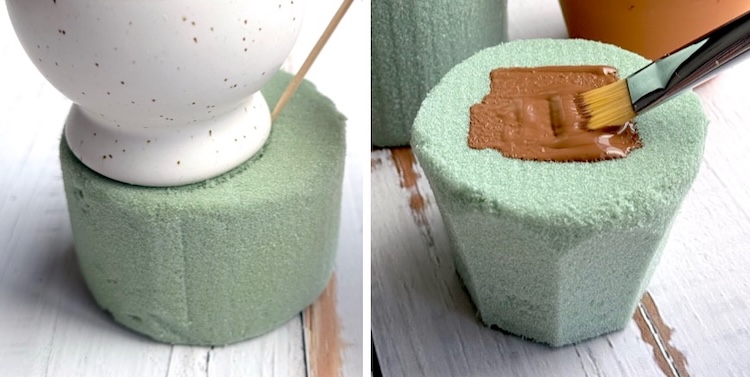
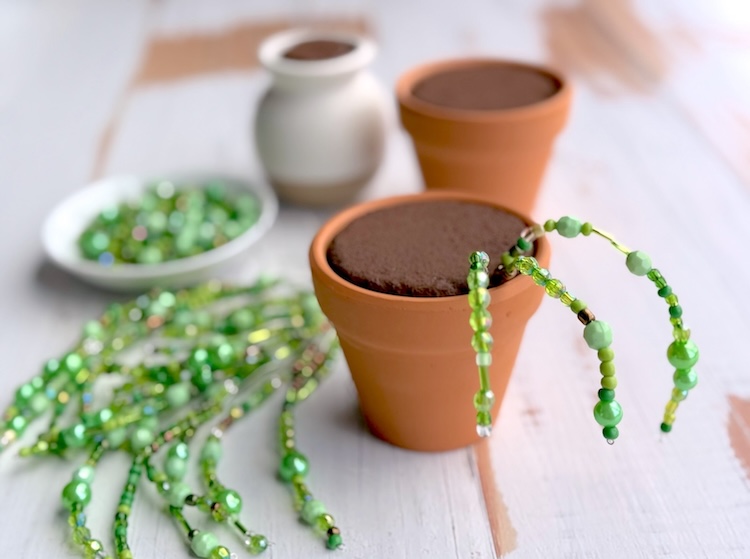
Step 1 Use a simple kitchen knife to carve and shape the foam to fit tightly into your pot. If needed, you can turn the pot upside down onto the foam and use a toothpick to trace the opening as a guide. BEFORE placing the foam all the way into your pot, paint the tops with your brown paint, going over the edge a bit like shown below.
Once the paint has dried, place the foam snuggly into your pot. The foam is soft and a bit pliable, so they should fit tightly as long as you don’t over trim them. If your foam seems loose, use some of your foam scraps on the sides to help secure it into place.
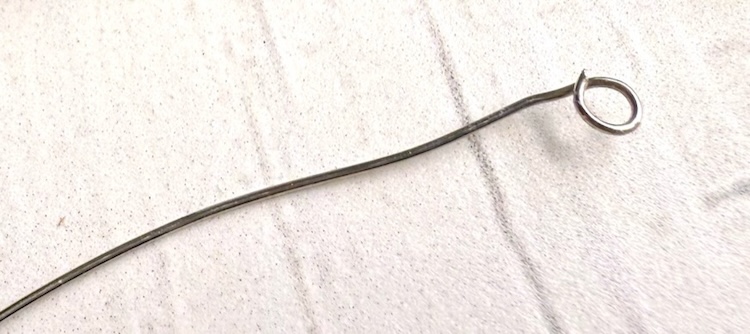
Step 2Time to make the beaded stems! Start off by cutting several pieces of wire ranging in sizes from 3-6 inches. Use the round nose pliers to form a small loop at the end of each one.
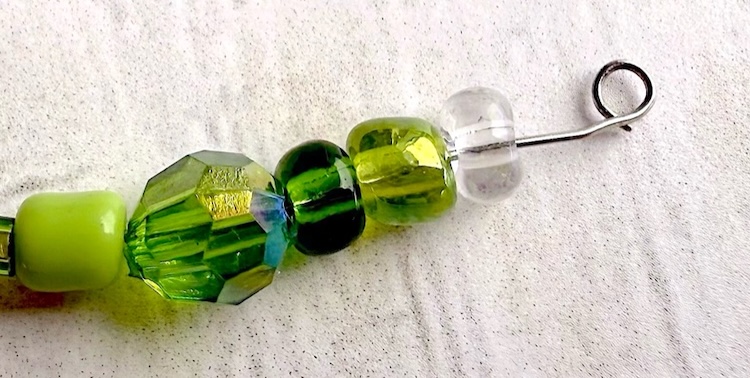
Next, lace beads onto the wires any way you’d like, choosing a pattern or making them random like mine.The beads you place on first will be the tips of your stems, so keep this in mind if you’re using floral or fancy beads you want to showcase.
To achieve a more natural plant appearance, try to make each stem in varying lengths. Once you’ve finished threading your beads, loop the end of the wire through the last bead and pull it tight.
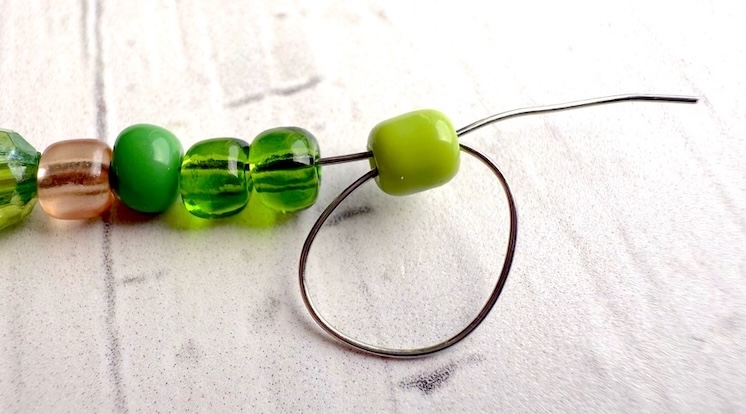
It helps to use the round nose pliers to pull the wire through while holding the last bead in place with your fingers. Be sure to leave 1-2 inches of wire at the end of each stem. Trim any excess if needed.

Step 3I probably formed 20-40 stems for each plant. You can make them all at once before assembling your plant, or place them in your pot as you go until you have the fullness you’re looking for.
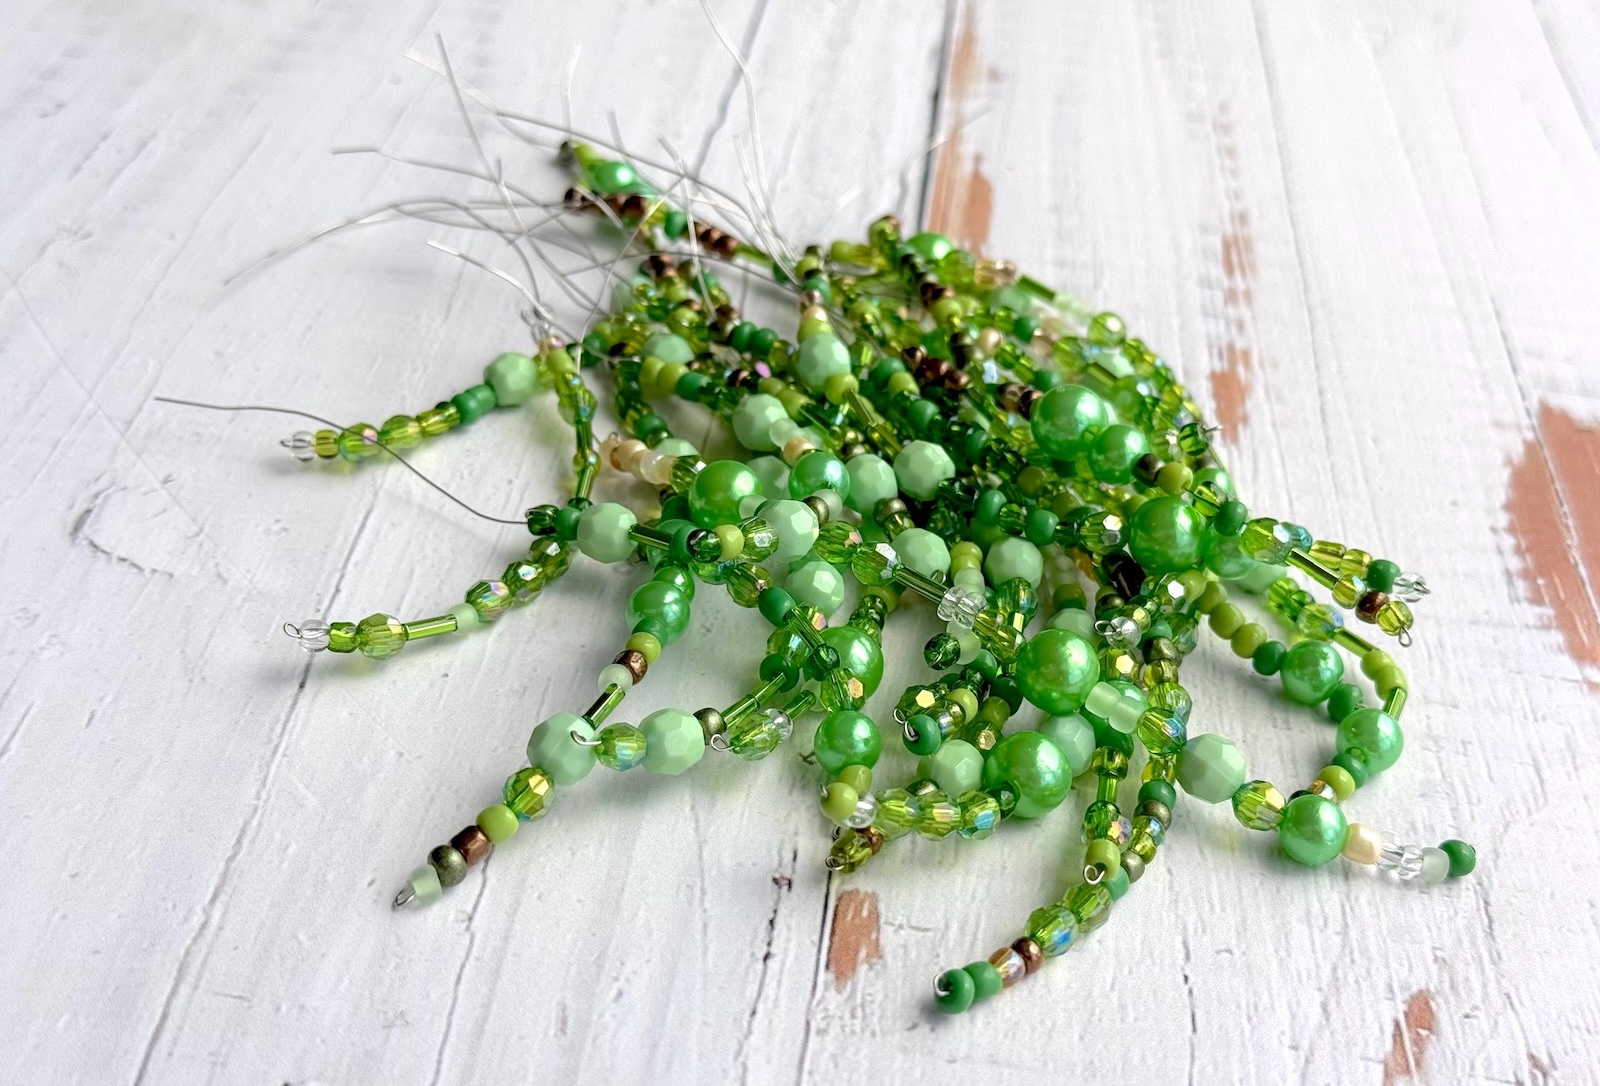
To assemble, simply stick the wire side of the stems into your prepared foam pots. There’s no right or wrong way to do this! You can start in the middle, outer edge, or just poke them in randomly.
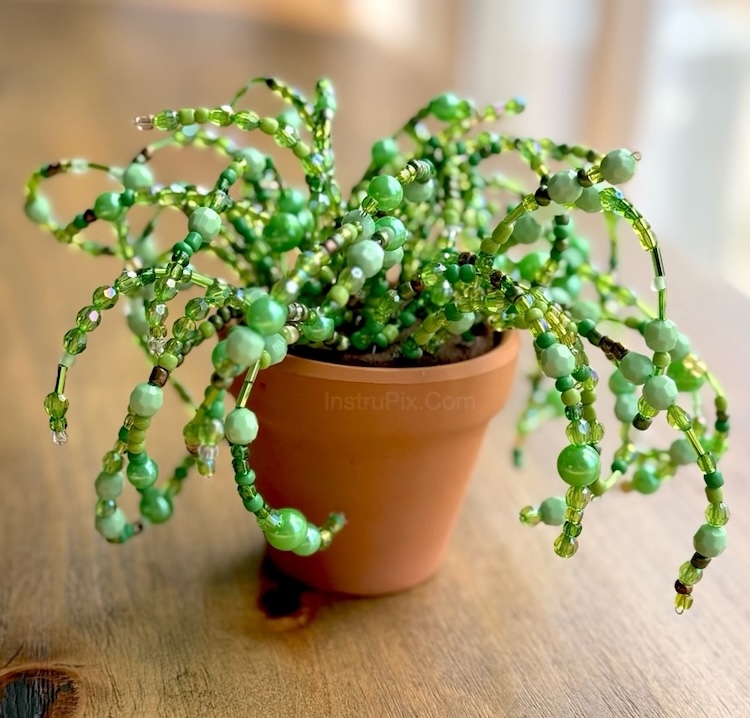
The wire is sturdy yet flexible, so you can bend and adjust each stem until you get them to look the way you want. I also pulled a few stems out and moved them around a bit. Play with them until you are happy with your creation.
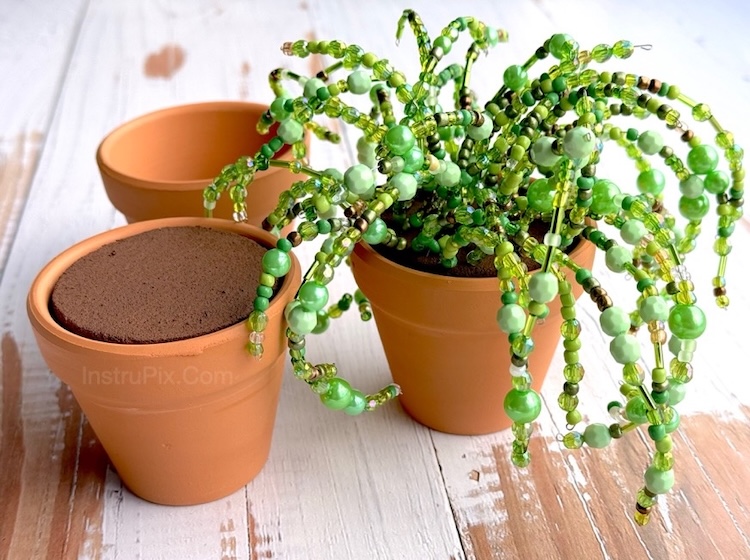

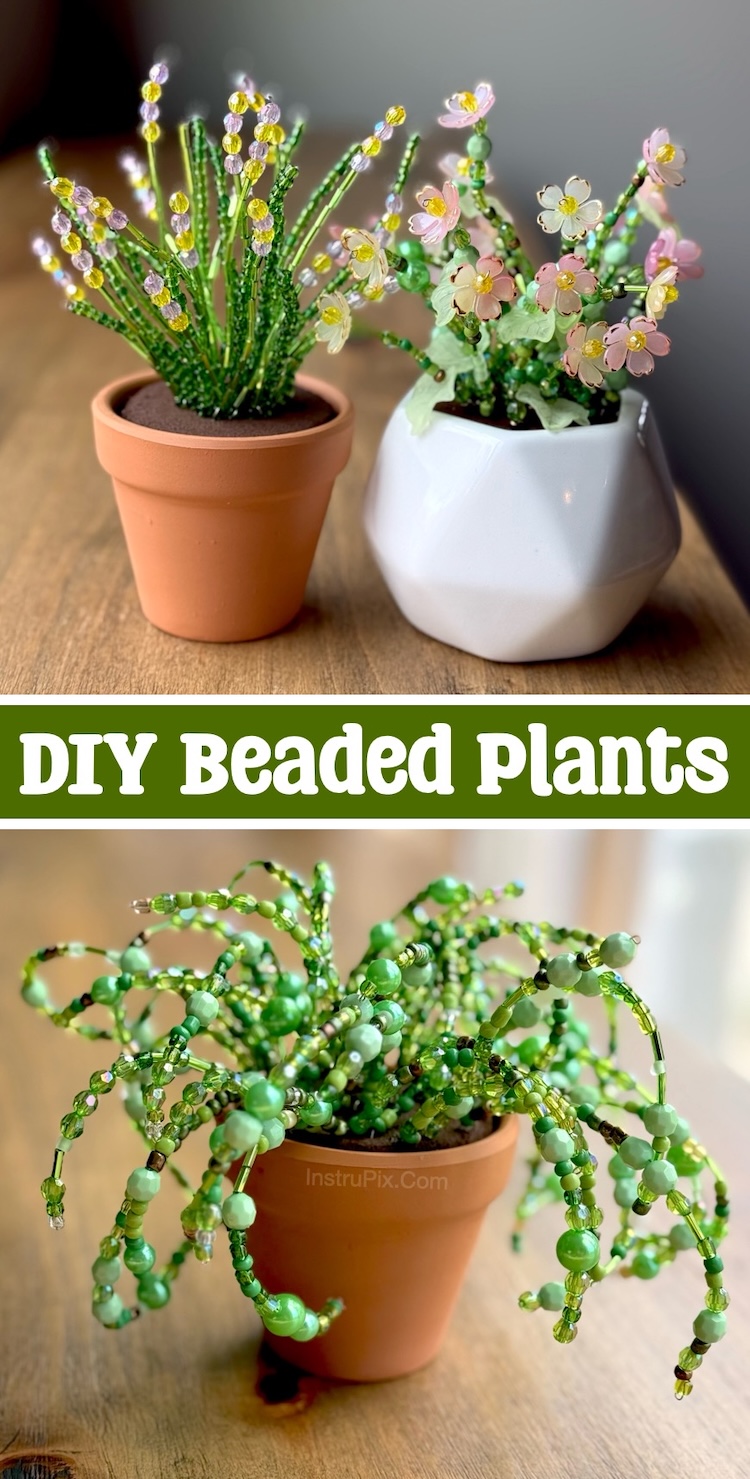
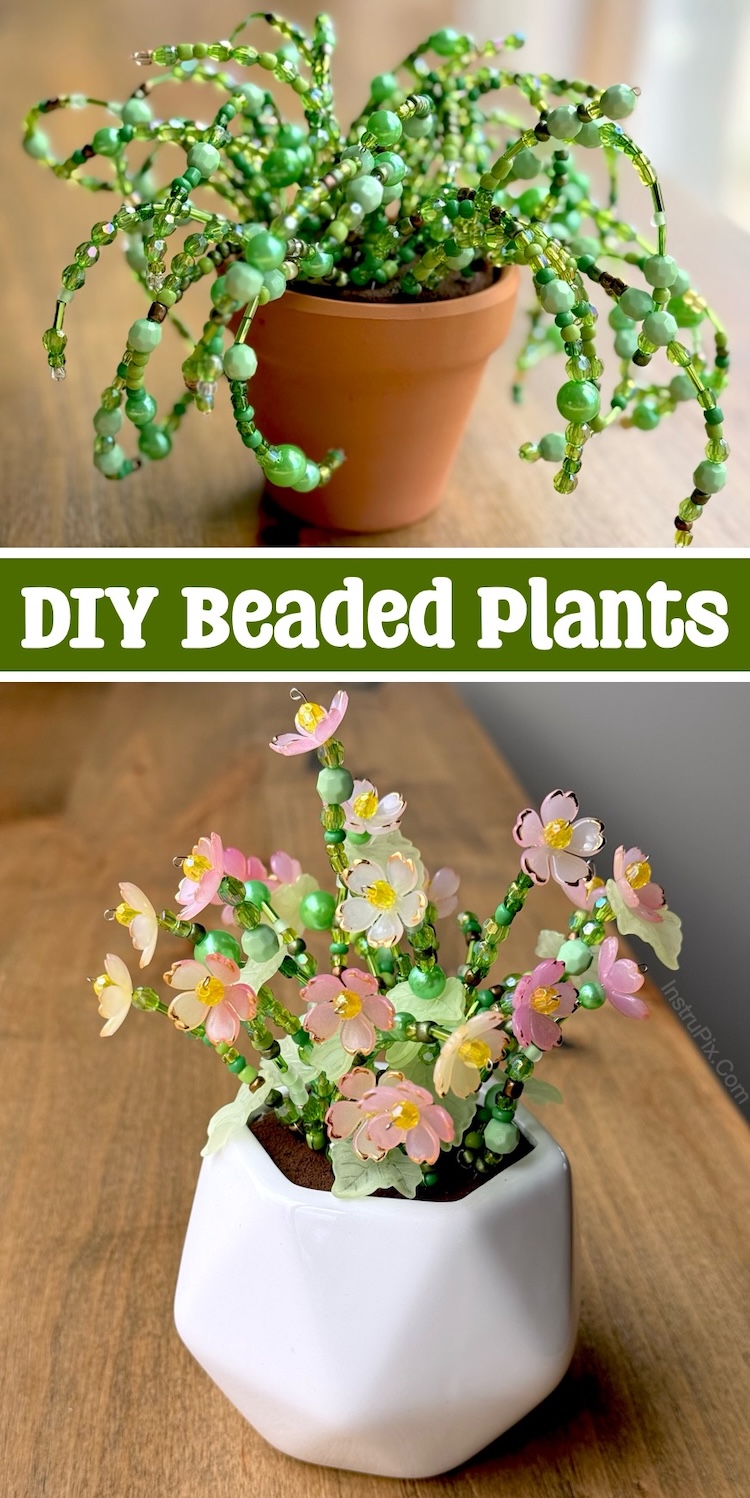
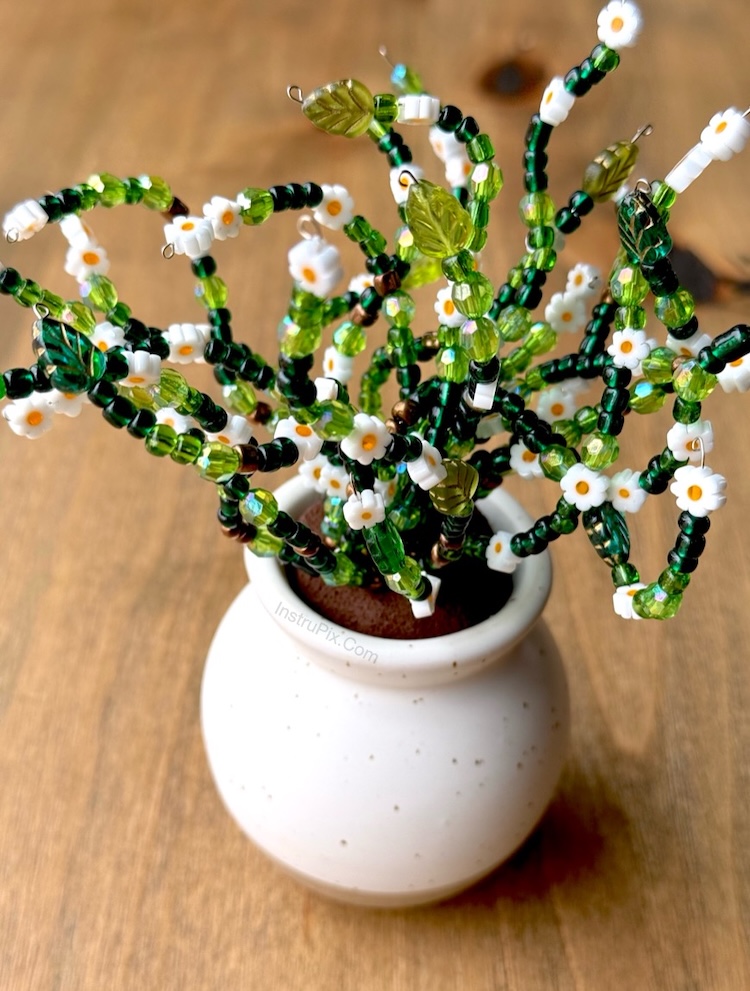
What do you think? The coolest project, EVER! Right? The first one I made looked a lot like a hanging succulent, which is exactly what I was going for. I was so thrilled with the end result, I decided to make several more of these awesome plants in various ways.
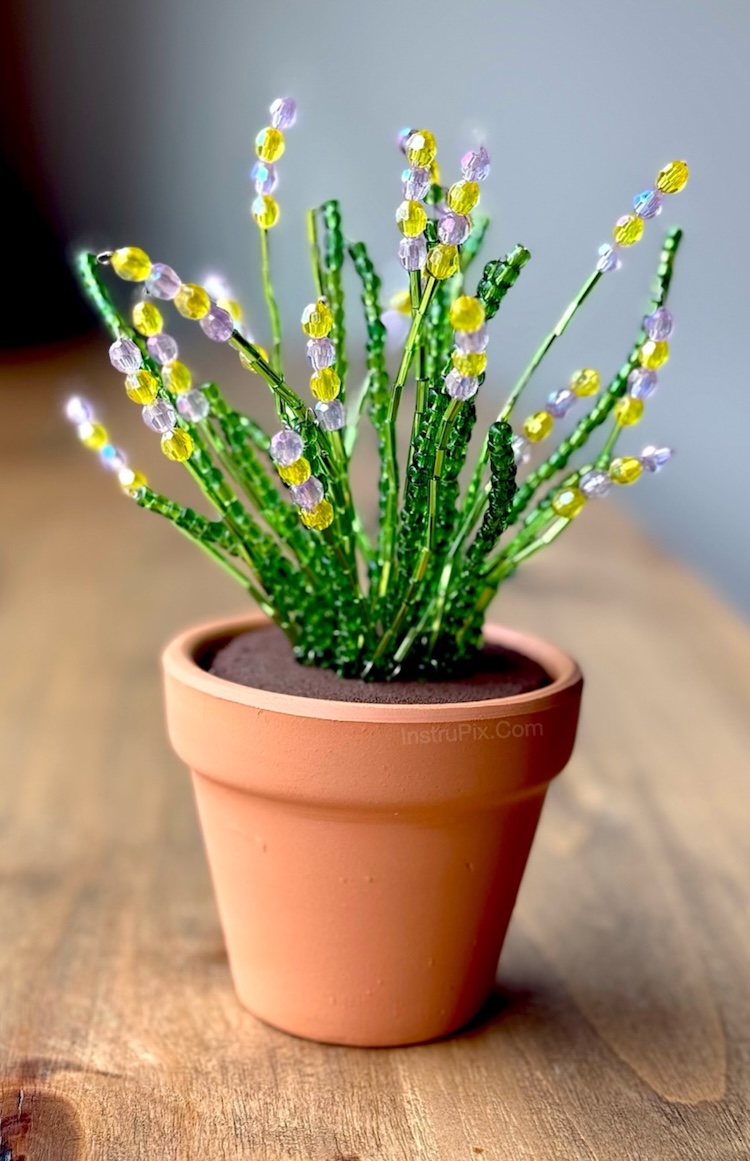
You can’t have a potted plant without a few spring flowers! This made the project even more interesting with added color and bling. The possibilities are endless with the availability of floral and leafy bead options.
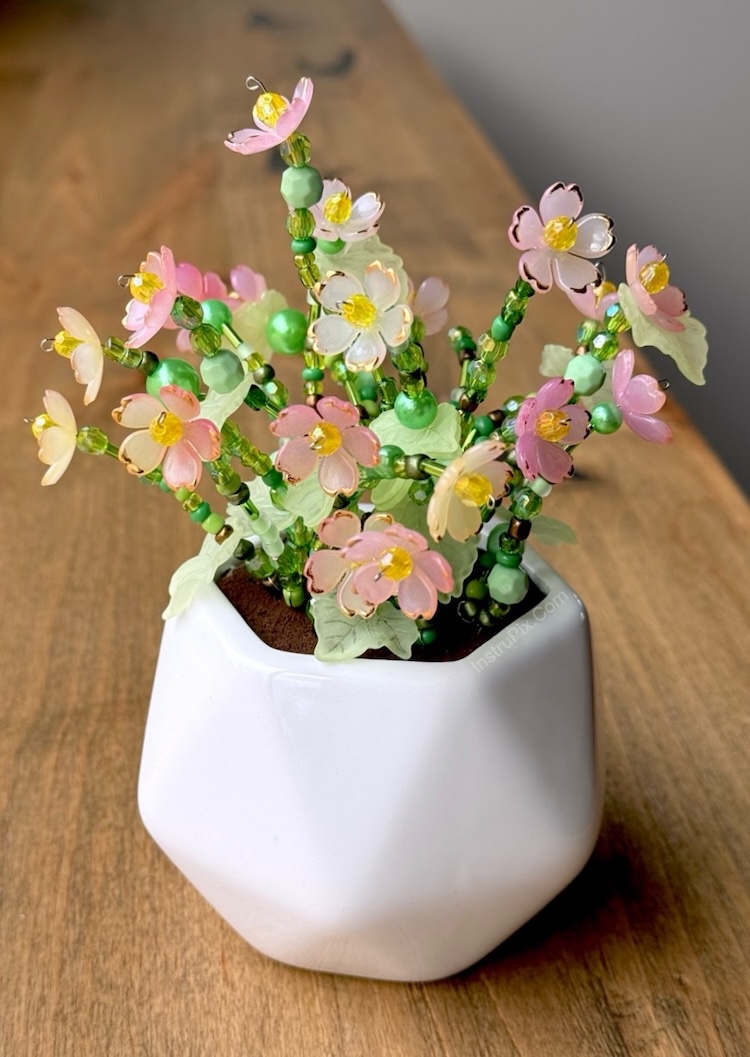
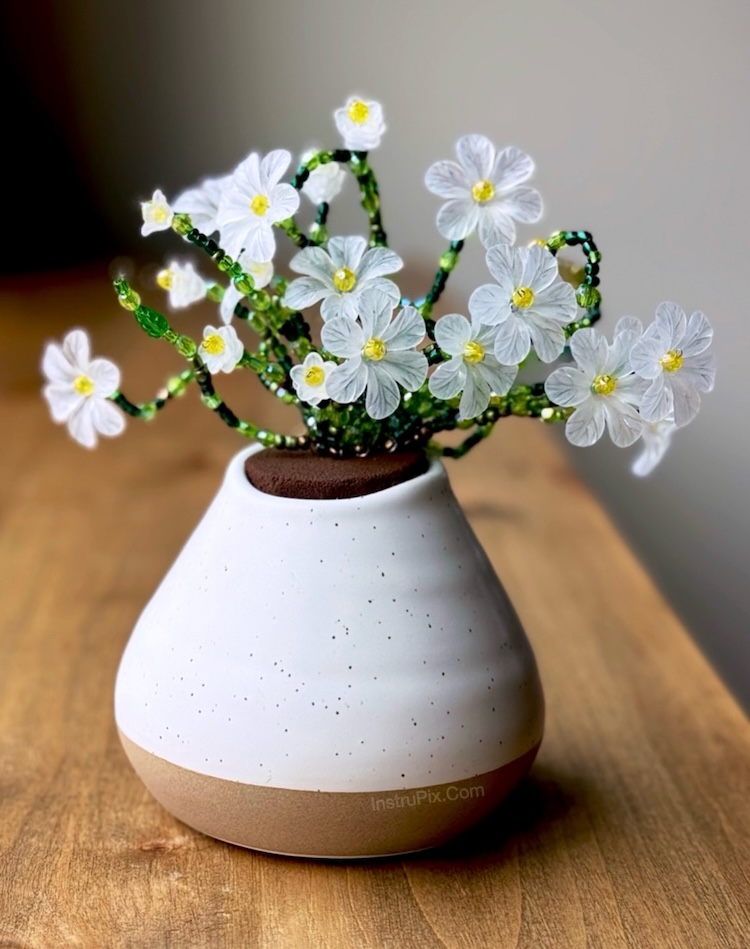

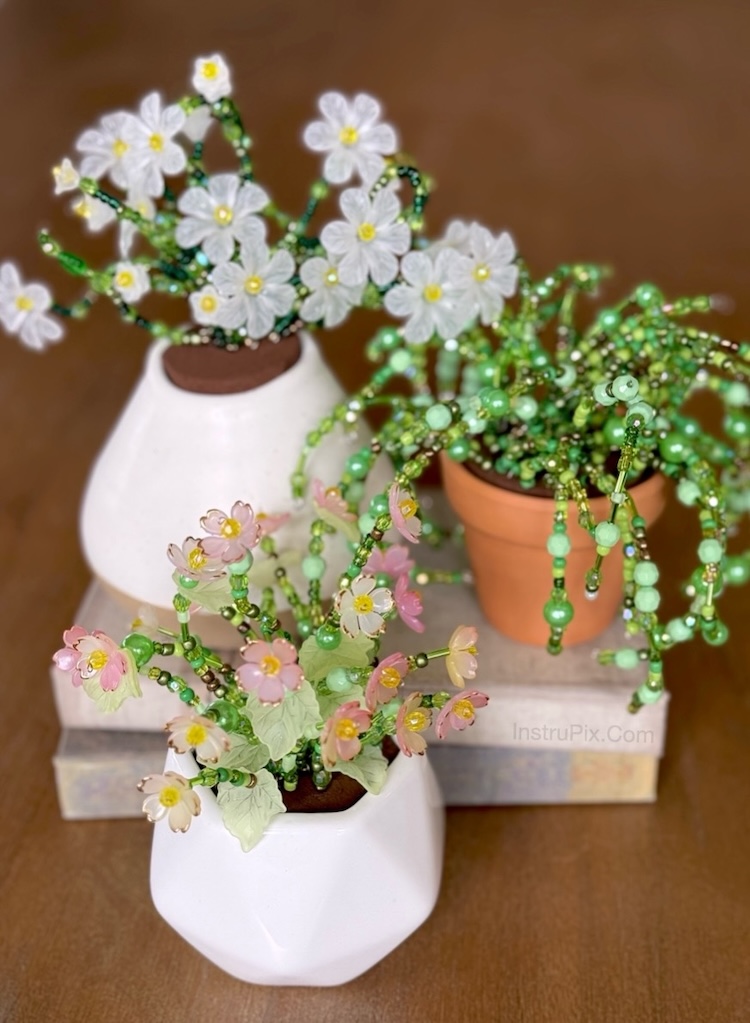
Who would have thought with just a few small pots, foam bases, and an assortment of colorful jewelry beads, you could design sparkling “blooms” that never fade! I hope you find a few ideas here that inspire you to break out your crafting supplies.
This is not only a fun and relaxing craft to make, this shimmering faux greenery is a thoughtful gift that could surely brighten someone’s day. They would be perfect for Mother’s Day, teacher appreciation gifts, birthdays, and more.
Helpful Tips
- How much wire will I need? I made 7 beaded plants and ended up going through 1½ small bundles of wire. It goes a lot further than you’d think! No need to buy more than one unless you plan on being a crazy beaded plant lady like me.
- How many beads should I buy? Again, you don’t need as many as you’d think, but I do recommend purchasing at least one variety pack of green beads along with some larger round beads to complement them.
- The small clay pots are cheap and can be purchased at Hobby Lobby or Michael’s. If you don’t like the clay color, you could paint them in any color desired. I like the idea of antiquing them with a small amount of beige or white paint.
- Any kind of foam should work for this project. The nice thing about the floral foam is that it holds the wires in place tightly and it’s super easy to trim to size with a dull kitchen knife. Other types of foam may require scissors to trim instead of a knife.
- If your foam seems loose in your pot, you can stick just about anything into the bottom and sides of the pot to give it a more secure fit such as some of your foam scraps or even a paper towel.
Don’t forget to pin and save this beautiful craft idea for later! 🙂